Table of Contents
ToggleThe shower floor takes more abuse than almost any surface in your home, constant water exposure, soap buildup, daily foot traffic, and temperature swings. Yet it’s often an afterthought during bathroom renovations. That’s a missed opportunity. The right shower floor tile doesn’t just handle the beating: it sets the tone for your entire bathroom, adds texture underfoot, and can actually improve safety. Whether someone’s planning a full remodel or just replacing a cracked pan, the tile choice affects durability, maintenance, slip resistance, and style for the next decade or more. Here’s how to pick shower floor tile that works as hard as it looks.
Key Takeaways
- Shower floor tile ideas must prioritize slip resistance with a COF rating of 0.60 or higher, as flat glossy tiles become dangerous when wet regardless of style.
- Mosaic tiles (2×2 inches or smaller) remain the gold standard for shower floors because their abundant grout lines provide natural traction, conform to slopes, and hide soap scum better than larger formats.
- Proper slope (1/4 inch per foot), waterproof membrane installation, and quality epoxy grout matter more than the tile material itself in preventing water damage and mold.
- Pebble and natural stone tiles create a spa-like experience with excellent water drainage, but require sealing every 12–18 months and regular maintenance to prevent mildew and mineral deposits.
- Large format tiles deliver a modern minimalist look but demand professional installation expertise and precision slope preparation to avoid rocking, lippage, and cracking.
- Test shower floor tile samples wet before purchasing, and combine proper tile selection with grab bars and bath mats for layered safety precautions rather than relying on tile alone.
Why Your Shower Floor Tile Choice Matters
Shower floors operate in a brutal environment. They sit in standing water, endure scrubbing with abrasive cleaners, and face constant humidity. A beautiful bathroom shower floor tile idea means nothing if the grout cracks in six months or someone slips getting out.
Slip resistance is non-negotiable. Flat, glossy tiles that look stunning on walls turn into ice rinks underfoot when wet. The COF (Coefficient of Friction) rating measures slip resistance: aim for 0.60 or higher for wet areas. Smaller tiles, like mosaics, naturally offer more grout lines, which create texture and grip.
Drainage matters just as much. Shower floors slope toward the drain at roughly 1/4 inch per foot. Larger tiles can complicate that slope, especially in smaller stalls. Smaller format tiles or flexible materials conform to the pitch more easily, preventing water pooling that leads to mildew and grout failure.
Durability varies by material. Porcelain and natural stone hold up better than ceramic in freeze-thaw cycles (if the shower backs up to an exterior wall). Softer stones like marble can etch from acidic cleaners. And maintenance is ongoing, sealers need reapplication, grout needs periodic cleaning, and some finishes demand more work than others.
The tile also needs to match the shower pan or mortar bed beneath it. A pre-sloped pan simplifies installation but may limit tile size. A traditional mud bed offers flexibility but requires skilled troweling to maintain slope. Either way, a proper waterproof membrane, sheet membrane or liquid-applied, is essential under the tile. Skipping it invites rot, mold, and expensive tear-outs.
Classic Mosaic Tile Patterns for Timeless Appeal
Mosaic tiles, typically 2×2 inches or smaller, remain the gold standard for shower floors. They’ve been used in bathrooms for over a century because they solve multiple problems at once. The small format bends to the slope without cutting, the abundant grout lines provide traction, and the patterns hide soap scum better than solid colors.
Common mosaic materials include porcelain, ceramic, and glass. Porcelain is the workhorse, dense, low-maintenance, and available in endless colors. Glass mosaics catch light beautifully but can be slippery unless they have a textured or matte finish. Ceramic is budget-friendly but softer and more prone to chipping under dropped shampoo bottles.
Penny round mosaics (small circles on mesh sheets) create a vintage, apothecary vibe. The curved edges feel pleasant underfoot and offer excellent grip. Square mosaics in a grid pattern deliver a clean, geometric look that pairs well with subway tile walls. Basketweave or herringbone layouts add visual interest without overwhelming a small space.
Installation is straightforward for a competent DIYer. Mosaics come on mesh-backed sheets (usually 12×12 inches), so they set quickly. Use a medium-bed mortar to account for any unevenness in the slope, and a high-quality epoxy or urethane grout to resist staining and mildew. Standard cement grout works but requires annual sealing.
One caution: avoid highly polished ceramic or glass mosaics unless they’re rated for wet floors. Manufacturers often label them: if in doubt, test a sample. Design platforms like Remodelista feature curated mosaic installations that show how color and layout affect the overall bathroom aesthetic.
Pebble and Natural Stone Tiles for a Spa-Like Experience
Pebble tiles mimic the look and feel of a riverbed. They’re sold as individual stones adhered to mesh backing, typically in 12×12-inch sheets. Stepping onto smooth, rounded pebbles provides a subtle foot massage and serious slip resistance, water channels between the stones instead of pooling.
Most pebble tiles are river rock (quartz or granite) or manufactured resin. Natural river rock is heavier, more durable, and requires sealing every 12–18 months. Resin pebbles are lighter, easier to cut, and sometimes come pre-sealed, but they can yellow over time or feel less substantial underfoot.
Installation demands patience. The uneven surface means more thinset and careful troweling to lock each pebble in place. Use a polymer-modified thinset for better adhesion and a small notch trowel (3/16 × 3/16 inch) to avoid voids. Once set, grout fills the gaps between stones, use a non-sanded epoxy grout to avoid scratching the polished pebbles. Grouting takes longer than flat tile because the grout must be worked into irregular spaces.
Maintenance is ongoing. Soap and mineral deposits collect between stones, so a stiff brush and acidic cleaner (diluted vinegar or a commercial lime remover) help. Unsealed natural stone can harbor mildew in the grout: annual sealing prevents this.
Slate, travertine, and quartzite tiles (typically 4×4 or 6×6 inches) offer a more uniform stone look with natural texture. Slate is dense and slip-resistant but can flake if low-quality. Travertine has a porous, matte finish that grips well but needs frequent sealing. Quartzite is nearly as hard as porcelain, resists staining, and comes in earthy tones.
For visual examples and project details on stone shower floors, Houzz features design portfolios that compare performance and aesthetics across materials.
Large Format Tiles for a Modern Minimalist Look
Large format tiles, 12×24 inches and up, deliver a sleek, contemporary look with fewer grout lines. In a shower floor, they create visual continuity, especially when the same tile runs up the walls or into the bathroom floor outside the shower.
But there’s a catch: achieving proper slope with large tiles requires precision. A well-executed mortar bed or pre-sloped foam pan is essential. If the substrate isn’t perfectly smooth and sloped, large tiles will rock or leave lippage (uneven edges). That’s why many pros recommend this for experienced DIYers or professional installs.
Porcelain planks (wood-look tiles, often 6×36 or 8×48 inches) are especially popular. They pair modern style with the durability of porcelain. Choose a matte or textured finish, polished wood-look tiles are dangerously slippery when wet.
Concrete-look porcelain (12×24 or 24×24 inches) in gray or charcoal tones creates an industrial-chic vibe. The matte surface provides decent slip resistance, and the minimal grout lines make cleaning faster.
Installation demands a large-notch trowel (1/2 × 1/2 inch) and back-buttering each tile to ensure full contact. Any voids under a large tile can lead to cracking. Use a leveling system (clips and wedges) to prevent lippage. Rectified tiles (machine-cut edges) allow for tighter grout joints, typically 1/16 inch, which emphasizes the seamless look.
Grout choice matters here. Epoxy grout resists staining and stays cleaner with minimal maintenance. It’s harder to work with, mix small batches and clean excess quickly, but it pays off over time.
One safety note: even textured large format tiles may not provide enough grip for everyone. Consider adding a textured strip or mat near the entry, or choose a smaller tile if anyone in the household has mobility concerns.
Hexagon and Geometric Tile Designs
Hexagon tiles (often 2-inch, 3-inch, or 4-inch across) inject personality without feeling trendy. The six-sided shape tessellates naturally, creating a honeycomb pattern that’s visually engaging but not chaotic. They work in nearly any style, classic white hex pairs with vintage fixtures, matte black hex suits modern baths, and multicolor hex brings energy to a kids’ bathroom.
Smaller hex tiles (2-inch) offer excellent slip resistance thanks to the grout lines. Larger hex (4-inch or more) looks bolder but may be slicker: opt for a matte or textured finish. Porcelain and ceramic hex tiles are most common, though natural stone hex (marble, slate) is available at higher price points.
Penny tiles (small rounds, about 3/4 inch diameter) are technically a circle, but they behave like mosaics, lots of grout, good grip, forgiving installation. They’re a go-to for retro or cottage-style bathrooms.
Triangles, diamonds, and chevrons are less common but make a statement. These require more layout planning and precise cuts around drains and curbs. Use a wet saw with a fresh diamond blade for clean edges. Geometric patterns also amplify lippage or grout inconsistencies, so take your time during installation.
Many geometric tiles come on mesh sheets, simplifying installation. Set them with medium-bed thinset and use spacers if the mesh allows. Grout color has a big impact, matching grout makes the pattern subtle, while contrasting grout (charcoal with white tile, for example) emphasizes the geometry.
For design inspiration and real-world examples of geometric bathroom floors, HGTV’s renovation galleries, which showcase completed projects with material lists and contractor notes.
How to Choose the Right Tile for Safety and Slip Resistance
Slip resistance isn’t about roughness, it’s about surface texture and water channeling. A tile can feel smooth to the hand but grip well underfoot because of micro-texture or grout lines.
Look for the COF (Coefficient of Friction) rating. For wet areas, aim for 0.60 or higher (sometimes labeled DCOF for Dynamic COF). The Americans with Disabilities Act (ADA) recommends 0.60 minimum for accessible showers. Many manufacturers list this spec: if not, ask before buying.
Texture types include:
- Matte or honed finishes: Flat but not slick: good all-around choice.
- Textured or embossed surfaces: Raised patterns (faux wood grain, stone texture) that improve grip.
- High-gloss or polished: Beautiful but dangerous when wet, reserve for walls.
- Grip strips or abrasive coatings: Aftermarket products that add traction to existing tile. Useful for rentals or quick fixes but not a substitute for proper tile selection.
Grout lines are underrated for safety. More grout = more texture. That’s why 1-inch or 2-inch mosaics outperform 12×24-inch planks in slip tests, even if the tile itself is the same material.
Maintenance affects safety, too. Soap scum, body oils, and mineral deposits create a slippery film. Clean weekly with a pH-neutral cleaner and a scrub brush. Avoid oil-based soaps or conditioners that leave residue.
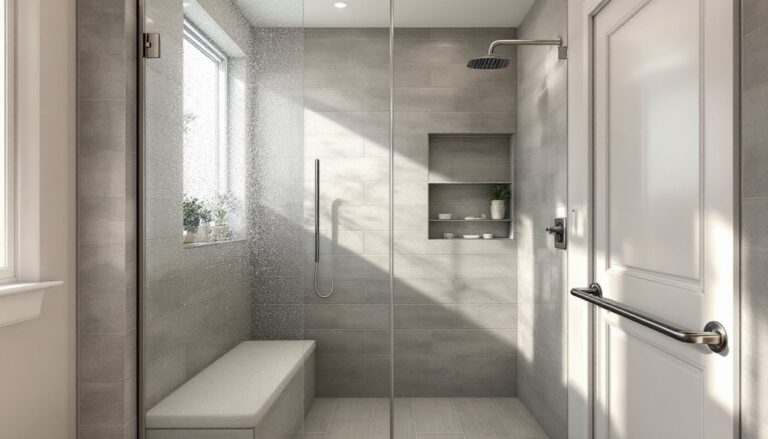
If someone in the household has limited mobility, add a grab bar anchored to blocking in the wall studs and a textured bath mat rated for wet use. No tile is slip-proof: layered precautions work best.
Finally, test before committing. Ask for a sample tile, wet it, and walk on it in bare feet. If it feels sketchy in the showroom, it’ll be worse in a soapy shower.
Conclusion
Shower floor tile isn’t a one-size-fits-all decision. The best choice balances aesthetics, safety, durability, and the reality of the installation skill level. Mosaics and pebbles deliver proven grip and character. Large format tiles offer modern simplicity but demand careful prep. Geometric patterns inject personality without sacrificing function, if the finish is right. Whatever direction someone takes, proper slope, a solid waterproof membrane, and quality grout matter more than the tile itself. Measure twice, test for slip resistance, and don’t skip the unsexy details. That’s how a shower floor survives the next ten years looking as good as day one.