
Table of Contents
ToggleMice in the walls, droppings behind the fridge, nibbled cereal boxes, there’s nothing subtle about a mouse problem. And while modern traps have gotten fancier, the classic Victor snap trap remains one of the most reliable, affordable solutions on the market. It’s spring-loaded, reusable, and devastatingly effective when set correctly. But here’s the thing: most people either set them wrong or place them in spots mice never visit. This guide walks through the exact process to set a Victor mouse trap safely, position it strategically, and actually catch the critters wreaking havoc in your home. No fluff, no guesswork, just straightforward instructions that work.
Key Takeaways
- Setting a Victor mouse trap correctly requires pulling the kill bar back, positioning the hold-down bar, and hooking it under the staple catch for a hair-trigger release that’s sensitive to light pedal pressure.
- Peanut butter is the most effective bait—use a pea-sized dab that forces mice to apply pressure to the trigger rather than steal a free snack.
- Place Victor mouse traps perpendicular to walls with the bait pedal facing the wall, not parallel, since mice travel along baseboards and edges.
- Use multiple traps (three to five spaced 2–3 feet apart) in confirmed mouse activity areas like behind appliances, under sinks, and along baseboards to dramatically increase catch rates.
- Always wear disposable gloves when handling traps or dead mice to protect against hantavirus and other pathogens, and check traps daily for sanitary and effective results.
- Seal entry points (gaps around pipes, vents, cracks) with steel wool or caulk after trapping, since traps only address the symptom, not the root cause of infestation.
Understanding Your Victor Mouse Trap Components
Before you start snapping fingers (literally), get familiar with what you’re working with. Most Victor wooden snap traps have five key parts:
- Wooden base: The platform that holds everything together. It’s untreated pine, so it absorbs scent, both good and bad.
- Spring-loaded kill bar: This is the U-shaped metal wire that snaps down. It’s under serious tension, so respect it.
- Bait pedal: The small metal tongue where you place bait. When a mouse steps on it, the trap releases.
- Hold-down bar: This thin wire holds the kill bar in place once you’ve set the trap. It’s the part you’ll carefully position during setup.
- Staple catch: The small metal loop that the hold-down bar hooks under. This is what keeps the trap armed until triggered.
Victor also makes plastic versions (like the Easy Set models) that use a different arming mechanism with a yellow pedal you press down. The wooden traps require more manual finesse, but both work on the same principle: bait, tension, and a hair-trigger release. For this guide, we’re focusing on the traditional wooden model, though the plastic versions follow similar setup logic with less finger risk.
Preparing the Trap for Setup
Don’t just rip open the package and start baiting. A little prep makes a big difference in catch rates.
First, check for manufacturing defects. Inspect the spring for rust or weak tension, and make sure the hold-down bar isn’t bent. A trap that won’t hold tension or releases too easily is worthless. Test the spring by gently pressing the kill bar down (away from your fingers) and releasing it. It should snap back hard.
Second, consider scent contamination. Mice are wary of unfamiliar smells, including factory oils, packaging adhesive, and human scent. Some seasoned pest control folks recommend wearing disposable gloves during setup to minimize human odor transfer. Others swear by lightly sanding the wooden base and bait pedal to remove factory coatings. It’s not strictly necessary, but it can improve results in homes where mice are already trap-shy.
Choose your bait carefully. Forget the cheese stereotype, peanut butter is the gold standard. It’s sticky (mice can’t grab and run), aromatic, and universally appealing. Use a dab about the size of a pea. Other effective baits include chocolate spread, bacon grease, or a sunflower seed glued down with a tiny bit of peanut butter. The key is making them work for it, not offering a free snack they can steal without triggering the trap.
Step-by-Step Instructions to Set Your Victor Mouse Trap
Now for the main event. Setting a Victor mouse trap isn’t complicated, but it does require a steady hand and respect for the spring tension. Here’s the exact process:
Step 1: Apply Bait to the Pedal
Place a small dab of peanut butter on the bait pedal before setting the trap. This keeps your fingers away from the business end during the arming process. Press it firmly into the metal so the mouse has to step on the pedal to access it.
Step 2: Pull Back the Kill Bar
Hold the wooden base firmly against a stable surface (not your lap, trust me). Grip the kill bar and pull it all the way back until it’s flat against the base, opposite the bait pedal. You’ll feel resistance from the spring. Keep your fingers clear of the pedal and the path the bar will travel when it releases.
Step 3: Position the Hold-Down Bar
With the kill bar pulled back, take the thin hold-down bar and bring it over the kill bar, pressing it down toward the bait pedal. This bar will hold everything in place.
Step 4: Hook the Hold-Down Bar Under the Staple Catch
This is the tricky part. While maintaining pressure on the hold-down bar, carefully hook its end under the small metal staple catch on the bait pedal. You’re creating a hair-trigger mechanism: the slightest pressure on the pedal will release the hold-down bar, which releases the kill bar. The trap should now be fully armed, with visible tension. If it snaps while you’re setting it, start over, and maybe use a pencil eraser to push the hold-down bar into place instead of your finger.
Step 5: Test the Sensitivity
Gently touch the bait pedal with a pencil or small stick. The trap should snap immediately. If it doesn’t, the hold-down bar isn’t seated correctly under the catch. Reset and adjust.
For detailed visual guidance on similar DIY project setups, step-by-step photo tutorials can clarify hand positioning during the arming process.
Best Placement Strategies for Maximum Effectiveness
Setting the trap correctly is only half the battle. Put it in the wrong spot, and you’ll catch nothing but dust.
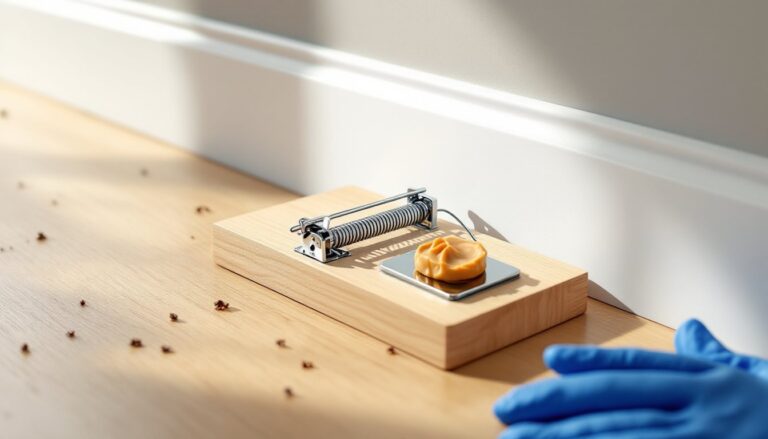
Place traps perpendicular to walls, not parallel. Mice travel along baseboards and edges, rarely venturing into open floor space. Position the trap so the bait pedal faces the wall, forcing the mouse to cross over the trigger as it moves along its usual route. The trap’s length should run perpendicular to the wall.
Look for signs of activity. Droppings, grease marks, gnawed packaging, and tiny footprints in dust all indicate high-traffic mouse areas. Common hotspots include:
- Behind appliances (refrigerator, stove, dishwasher)
- Under sinks and near plumbing penetrations
- In pantries and cabinets where food is stored
- Along basement or attic baseboards
- Near entry points like gaps around pipes or vents
Use multiple traps. A single trap is a gamble. Set at least three to five traps in any area with confirmed mouse activity, spaced 2–3 feet apart along the same wall. Mice aren’t cautious about traps they haven’t seen before, so saturating an area increases your odds dramatically.
Avoid contaminated areas. Don’t set traps directly in pet food bowls, near water sources, or anywhere the trap could be triggered by non-target animals or kids. If you have pets or small children, place traps inside a trap box or behind appliances they can’t access. Many home maintenance guides recommend using cardboard boxes with mouse-sized entry holes to shield traps from accidental contact.
Safety Tips and Common Mistakes to Avoid
Victor traps are simple tools, but they can cause injury if handled carelessly. Here’s what to watch out for:
Always set the trap on a stable surface, never in your hand. The spring has enough force to break a finger or cause a nasty bruise. Use a flat countertop or floor, and keep your fingers out of the kill zone.
Don’t over-bait. A giant glob of peanut butter lets the mouse lick it off without applying enough pressure to the pedal. A pea-sized dab is plenty.
Avoid touching the trap excessively after setting it. Human scent can make mice wary. If you need to move a set trap, use gloves or pick it up by the edges of the wooden base, never by the hold-down bar.
Never disable the trap’s tension. Some people try to “soften” the spring or file down the staple catch to make setting easier. This reduces effectiveness and can cause the trap to malfunction or fail to kill humanely.
Check traps daily. A dead mouse left in a trap for days creates odor, attracts flies, and is generally unsanitary. Morning checks are ideal, since mice are most active at night.
Keep traps out of reach of pets and children. A dog or cat nosing around a set trap can get hurt. Use barrier boxes or place traps in areas pets can’t access. For households with curious toddlers, consider placing traps on top of cabinets or behind appliances, though this may reduce effectiveness.
For additional safety protocols on workshop and DIY projects, always prioritize protective measures when dealing with spring-loaded mechanisms.
What to Do After the Trap Is Triggered
Congratulations (sort of), you caught a mouse. Now what?
Wear disposable gloves. Mouse droppings and urine can carry hantavirus, salmonella, and other pathogens. Don’t handle a dead mouse or a used trap with bare hands.
Dispose of the mouse properly. Place the entire trap (mouse included) into a plastic bag, seal it, and dispose of it in an outdoor trash bin. If you want to reuse the trap, remove the mouse carefully and place it in a sealed bag before discarding. Some people prefer to toss the whole trap after one use to avoid cleanup, they’re cheap enough that this is a reasonable option.
Clean and reset reusable traps. If you’re reusing the trap, rinse it with hot water and a mild detergent, then let it air dry. Don’t soak wooden traps for extended periods, as the wood can swell and warp. Wipe down with a disinfectant solution (1 part bleach to 10 parts water) to kill pathogens.
Re-bait and reposition if necessary. If you caught one mouse, there are likely others. Reset the trap in the same location or move it to another high-traffic area. Continue trapping until you go at least a week without a catch.
Address the root cause. Traps treat the symptom, not the problem. Inspect your home for entry points (gaps around pipes, vents, door sweeps, foundation cracks) and seal them with steel wool, caulk, or hardware cloth. Mice can squeeze through openings as small as a dime. Remove food sources by storing dry goods in sealed containers and cleaning up crumbs promptly.
Conclusion
Setting a Victor mouse trap isn’t rocket science, but doing it right, bait choice, placement, and trigger sensitivity, makes all the difference between empty traps and a rodent-free home. Follow the steps, respect the spring tension, and don’t skip the prep work. With a few well-placed traps and a bit of patience, you’ll reclaim your pantry, your peace of mind, and your cereal boxes.