Table of Contents
ToggleMost dishwashers don’t ship with a power cord. That surprises new buyers, but it’s standard practice, manufacturers leave the connection method up to the installer since local codes and kitchen setups vary. Whether replacing an old dishwasher or installing a new one, understanding power cord options and proper installation prevents tripped breakers, code violations, and potential fire hazards. This guide walks through selecting the right dishwasher cord, installing it safely, and troubleshooting common problems without calling an electrician for every hiccup.
Key Takeaways
- Most dishwashers don’t include a power cord, and choosing the correct dishwasher power cord with proper wire gauge (14-gauge for 15-amp circuits) is critical to prevent overheating, breaker trips, and fire hazards.
- A dishwasher power cord kit must include a three-prong grounded plug, strain relief fittings, and wire connectors sized for appliance use, never substitute an extension cord or household appliance cord.
- Installing a dishwasher power cord safely takes 20–30 minutes and requires verifying power is off at the breaker, properly stripping and twisting wire connections, and using correctly sized wire nuts before testing the circuit.
- Common issues like intermittent power loss or tripped breakers often result from loose wire connections or improper strain relief, both preventable with careful installation and regular inspection.
- Always check local electrical codes before installation, maintain proper grounding, and call a licensed electrician if you’re uncomfortable with the work or suspect damaged insulation or arcing.
Why Your Dishwasher Needs the Right Power Cord
Dishwashers typically draw between 10 and 15 amps during operation, requiring a dedicated 120-volt circuit in most residential installations. Using an undersized or incorrect cord creates resistance, leading to overheating, melted insulation, or nuisance breaker trips mid-cycle.
The National Electrical Code (NEC) specifies requirements for appliance wiring, though local amendments vary by jurisdiction. Most codes allow either a cord-and-plug connection or direct hardwiring, but some localities mandate one method over the other. Always check with your local building department before starting.
A proper dishwasher power cord kit includes three components: a three-prong cord rated for appliance use, strain relief fittings to prevent wire damage where the cord exits the junction box, and wire connectors sized for 12- or 14-gauge wire. Kits are typically rated for 15 amps and include a grounding wire, never skip the ground connection.
Using an extension cord or standard household appliance cord isn’t code-compliant and voids most manufacturer warranties. Dishwasher cords must meet UL listing requirements for appliance use and handle both the continuous load and startup surge when the pump and heating element kick on.
Types of Dishwasher Power Connections
Dishwashers connect to power in two primary ways: a removable dishwasher plug or permanent hardwiring. The choice depends on local code, kitchen layout, and whether an accessible outlet exists under the sink or behind the cabinet.
Power Cord vs. Direct Hardwiring
Cord-and-plug connections offer flexibility. If the dishwasher needs service or replacement, unplugging is simpler than disconnecting hardwired connections. This method requires a grounded three-prong outlet, typically installed in the sink cabinet or adjacent cabinet. The outlet must be accessible without removing the dishwasher, code doesn’t allow it hidden behind the unit.
The dishwasher cord itself is usually 4 to 6 feet long with a 90-degree plug to fit tight spaces. Most kits use 14-gauge wire for 15-amp circuits. The cord terminates in the dishwasher’s junction box with wire nuts connecting black (hot), white (neutral), and green or bare copper (ground).
Hardwiring involves running electrical cable (typically 14/2 or 12/2 Romex with ground) directly from the circuit breaker to the dishwasher’s junction box. This method is cleaner visually and eliminates the need for an outlet, but requires shutting off power at the breaker for any disconnection. Many appliance installation guides recommend hardwiring for permanent installations in new construction.
Some older homes have a switched receptacle for the dishwasher, allowing control from a wall switch. That’s uncommon now, most dishwashers use their own control panel for power management.
How to Choose the Correct Dishwasher Power Cord
Not all dishwasher cord kits are universal. Check three specifications before purchasing: wire gauge, cord length, and plug configuration.
Wire gauge must match or exceed the dishwasher’s amp draw and circuit rating. A 15-amp circuit uses 14-gauge wire: a 20-amp circuit requires 12-gauge. Most residential dishwashers run on 15-amp circuits, so 14-gauge cords are standard. Never use a cord with thinner wire than the circuit, it’s a fire risk.
Cord length ranges from 4 to 6 feet. Measure from the dishwasher’s junction box location (usually lower right rear) to the outlet location. Leave some slack for pulling the unit out during maintenance, but excessive length creates a tangled mess in the cabinet. Most under-sink outlets sit 12 to 18 inches from the dishwasher opening, making a 5-foot cord ideal.
Plug configuration should be a three-prong grounded plug. Older homes might have ungrounded two-prong outlets, but adapters aren’t code-compliant for permanent appliances. If the outlet lacks a ground, hire an electrician to run new cable from the panel.
Most dishwasher plug kits include strain relief connectors, plastic or metal fittings that clamp the cord where it enters the junction box. These prevent vibration from loosening connections or abrading the wire insulation. Many kitchen appliance specialists emphasize this component as critical for long-term reliability.
Buy from reputable suppliers. No-name cords from discount outlets may lack UL listing or use substandard materials. A quality cord kit runs $15 to $25, not worth cutting corners.
Step-by-Step: Installing a Dishwasher Power Cord
Installing a dishwasher power cord kit takes 20 to 30 minutes with basic hand tools. Work carefully and verify power is off before touching any wires.
Materials and Tools:
- Dishwasher power cord kit (14-gauge, 3-prong)
- Wire strippers
- Screwdrivers (flat and Phillips)
- Wire nuts (usually included in kit)
- Voltage tester
- Work gloves and safety glasses
Installation Steps:
-
Shut off power at the circuit breaker. Flip the breaker for the dishwasher circuit to OFF. If unsure which breaker, turn off the main until you identify the correct one. Use a voltage tester to confirm no power at the outlet.
-
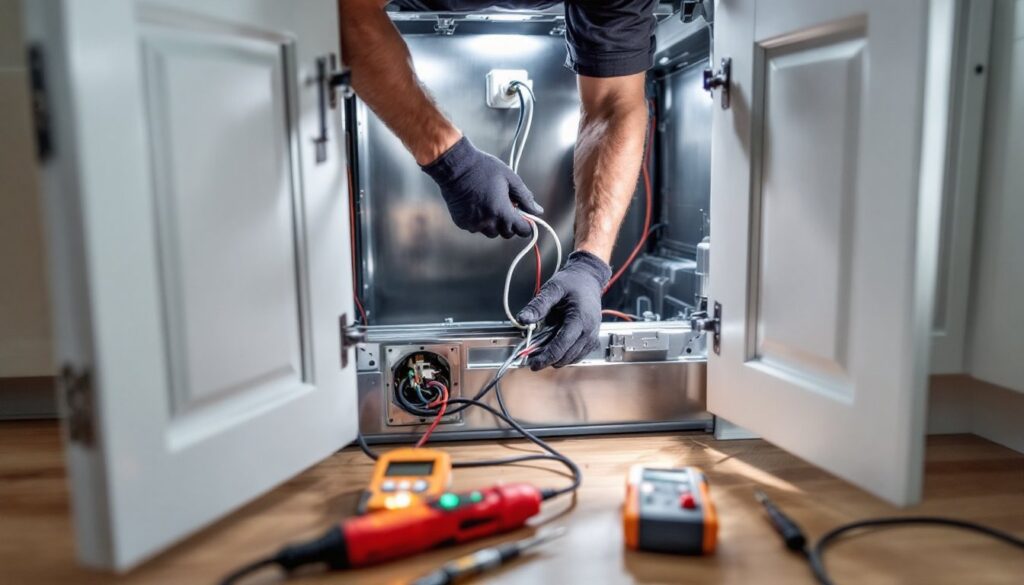
Access the junction box. Remove the dishwasher’s lower front panel. The junction box is typically a metal or plastic box on the lower right front of the unit. Remove the cover plate, usually one screw.
-
Install the strain relief fitting. Thread the strain relief connector through the knockout hole in the junction box (you may need to remove a pre-punched slug). Feed the cord through the fitting from outside, leaving 6 to 8 inches of wire extending into the box. Tighten the strain relief clamp, it should grip the cord jacket firmly without cutting into it.
-
Strip and connect wires. Strip 1/2 inch of insulation from each cord wire. Inside the junction box, you’ll find three dishwasher wires: black (hot), white (neutral), and green or bare copper (ground). Match colors: black to black, white to white, green to green/bare. Twist wire ends together clockwise, then thread on wire nuts and tighten until snug. Tug each connection, it shouldn’t pull apart.
-
Secure and test. Tuck wires neatly into the junction box, replace the cover plate, and reinstall the front panel. Plug the cord into the outlet. Restore power at the breaker and run a test cycle.
Safety note: If the junction box wires are hardwired cable rather than a pigtail, you’ll need to strip and connect directly to the incoming cable. This is slightly more advanced, if uncomfortable, call a licensed electrician.
Never work on live circuits. Even experienced DIYers can make fatal mistakes with live 120-volt connections. Taking an extra two minutes to verify power is off is always worth it.
Common Power Cord Problems and Troubleshooting
Even correctly installed dishwasher cords can develop issues over time. Most problems trace to loose connections, damaged insulation, or improper strain relief.
Dishwasher won’t power on: First, check the outlet. Plug in a work light or radio to verify power. If the outlet is dead, reset any GFCI receptacles in the kitchen and check the breaker. If the outlet works but the dishwasher doesn’t, open the junction box and inspect connections. A loose wire nut or corroded wire can interrupt the circuit. Tighten connections and look for any blackened or melted wire, that indicates overheating and requires replacing the cord.
Intermittent power loss: Often caused by vibration loosening wire nuts or the strain relief failing. Over months of operation, dishwasher vibration can work connections loose if not properly secured. Re-tighten all wire nuts and ensure the strain relief grips the cord jacket, not individual wires.
Tripped breaker during cycle: If the breaker trips only during the heating cycle, the dishwasher may be drawing more current than the circuit can handle, possibly due to a failing heating element. If the breaker trips immediately on startup, suspect a short circuit. Inspect the cord for pinched or damaged insulation where it passes through cabinets. Sometimes installers route cords around sharp cabinet edges, eventually wearing through the jacket.
Burned smell or hot plug: Shut off power immediately. A hot plug or outlet indicates resistance, likely from a loose connection or an undersized cord. Remove the plug and inspect for discoloration or melted plastic. Replace the dishwasher plug and check that the outlet’s internal contacts aren’t worn. Outlets wear out, especially in high-current applications.
Some issues require professional help. If you’re unsure about diagnosing electrical problems, or if you see evidence of arcing or significant damage, call a licensed electrician. Electrical fires often start small and smolder for hours before igniting visible flames.
Safety Tips and Code Compliance
Working safely with electrical connections isn’t optional. Follow these guidelines whether installing a new cord or troubleshooting an existing one.
Always verify power is off. A non-contact voltage tester is cheap insurance, around $15 for a reliable model. Test both the outlet and inside the junction box before touching wires. Don’t rely on someone else’s word that the breaker is off.
Use proper wire connectors. Wire nuts must be sized for the wire gauge and number of conductors. Most dishwasher power cord kits include correctly sized connectors, but if adding your own, check the packaging. A too-small wire nut won’t grip properly: a too-large nut leaves wire exposed.
Maintain proper grounding. The green or bare ground wire is a life-safety feature. It provides a low-resistance path to ground if a hot wire contacts the metal cabinet, tripping the breaker instead of energizing the case. Never omit the ground, even if the old installation lacked one.
Don’t overload circuits. Dishwashers should be on a dedicated circuit per NEC Section 422.16(B)(2). That means nothing else plugged into the same circuit. If your dishwasher shares a circuit with counter outlets and trips breakers frequently, it’s time to run a new dedicated circuit, not a DIY job unless you’re comfortable with panel work.
Permits and inspections: Some jurisdictions require permits for appliance circuit work, especially if running new cable. Check local requirements. Skipping permits can complicate home sales and void homeowner’s insurance claims if a fire occurs.
Cord routing matters. Keep cords away from hot water lines, disposal mounting flanges, and sharp cabinet edges. Route the cord with a gentle bend, no tight 90-degree kinks that stress the conductors. Many home safety experts note that proper cord routing extends service life significantly.
When to call a pro: If your electrical panel is older (fuses instead of breakers, aluminum wiring, or no main shutoff), or if you’re uncomfortable working inside the panel, hire a licensed electrician. Same goes for any situation where you’re uncertain about wire identification or circuit paths. Electrical work isn’t the place to learn by trial and error.